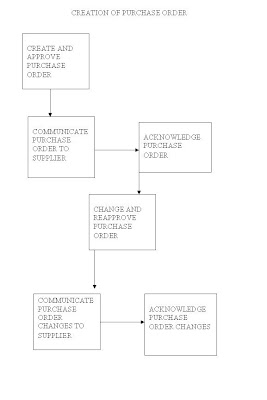
1ST STEP – CREATE AND APPROVE PURCHASE ORDER
Create your purchase order by entering header and line information. You can specify the shipment dates and quantities for each item, and how the shipment should be distributed across different accounts. Submit your order for approval when it is complete.
2ND STEP – COMMUNICATE PURCHASE ORDER TO SUPPLIER
Once your purchase order has been approved, send it to the supplier by Electronic Data Interchange (EDI), the Web, printed hard copy, or fax. If you communicate your purchase order by the Web, Oracle Supplier Management Portal allows your supplier to view and download the purchase order into their system.
3RD STEP – ACKNOWLEDGE PURCHASE ORDER
Enter the supplier's acceptance of the purchase order. Use the Purchase Order Summary window to query your purchase order. Choose Acceptances from the Tools menu and enter the supplier's acceptance of the purchase order.
4TH STEP – CHANGE AND REAPPROVE PURCHASE ORDER
Make changes to a purchase order, even after approval, by querying on the purchase order number and then making the necessary changes. Through the use of Oracle Workflow, Oracle Purchasing can then route the changed purchase order through a different approval hierarchy if necessary.
5TH STEP – COMMUNICATES PURCHASE ORDER CHANGES TO SUPPLIER
Once your changed order has been approved, communicate the change to the supplier by Electronic Data Interchange (EDI), the Web, printed hard copy, or fax. If you communicate your purchase order by the Web, Oracle Supplier Management Portal allows your supplier to download the purchase order into their system.
6TH STEP – ACKNOWLEDGE PURCHASE ORDER CHANGES
Enter your supplier's acceptance of the purchase order changes. Use the Purchase Order Summary window to query your purchase order. Choose Acceptances from the Tools menu and enter the supplier's acceptance of the purchase order changes.
No comments:
Post a Comment